Internal approval
An internal approver — an admin or team lead must review and approve the work order inside Zuper before Zuper sends it to the subcontractor.Approve a work order internally
- Select Purchasing from the left navigation menu and choose Purchase Orders.
- Select the work order you want to approve. The work order detail page opens.
- Review the work order details to confirm everything is correct.
- Select Mark as Approved in the top-right corner of the page.
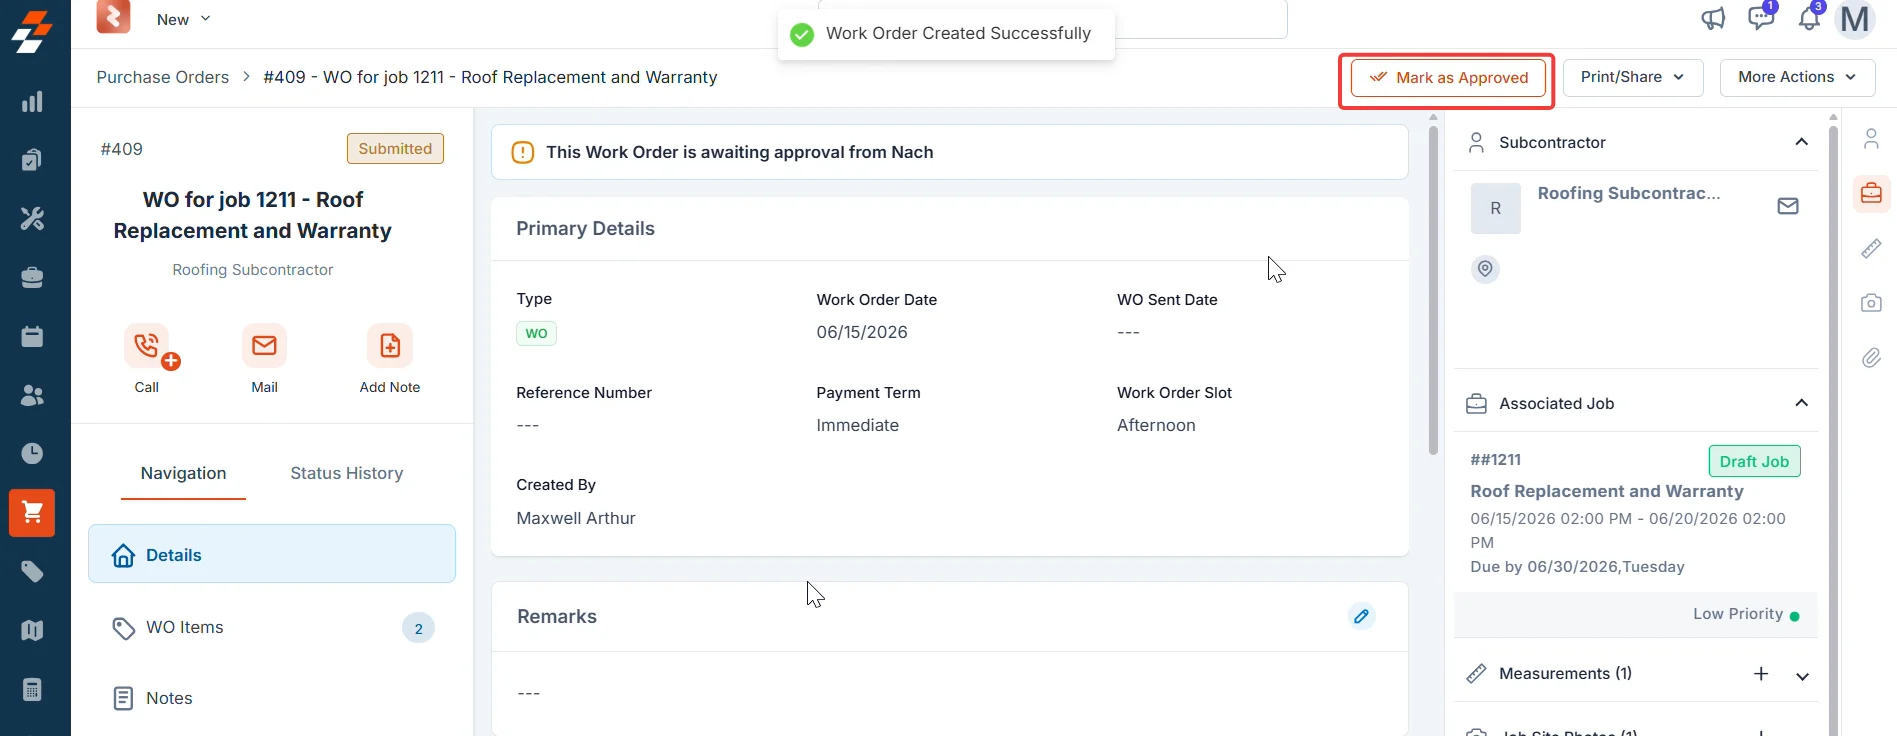
The Approved status appears only if your organization has an approval hierarchy configured in Settings → Modules → Purchasing → General Settings. If no approval workflow is set up, the work order moves directly from Submitted to the sending workflow.
Subcontractor review and acceptance
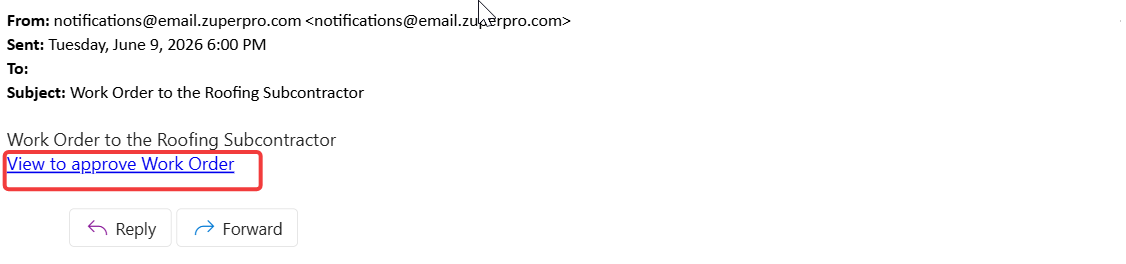
The subcontractor receives an email from Zuper with the work order attached as a PDF and a link to review and accept or reject the order on the subcontractor portal.Open the work order from the email
- Open the email from Zuper in your inbox.
- Select the View to approve Work Order link in the email body.
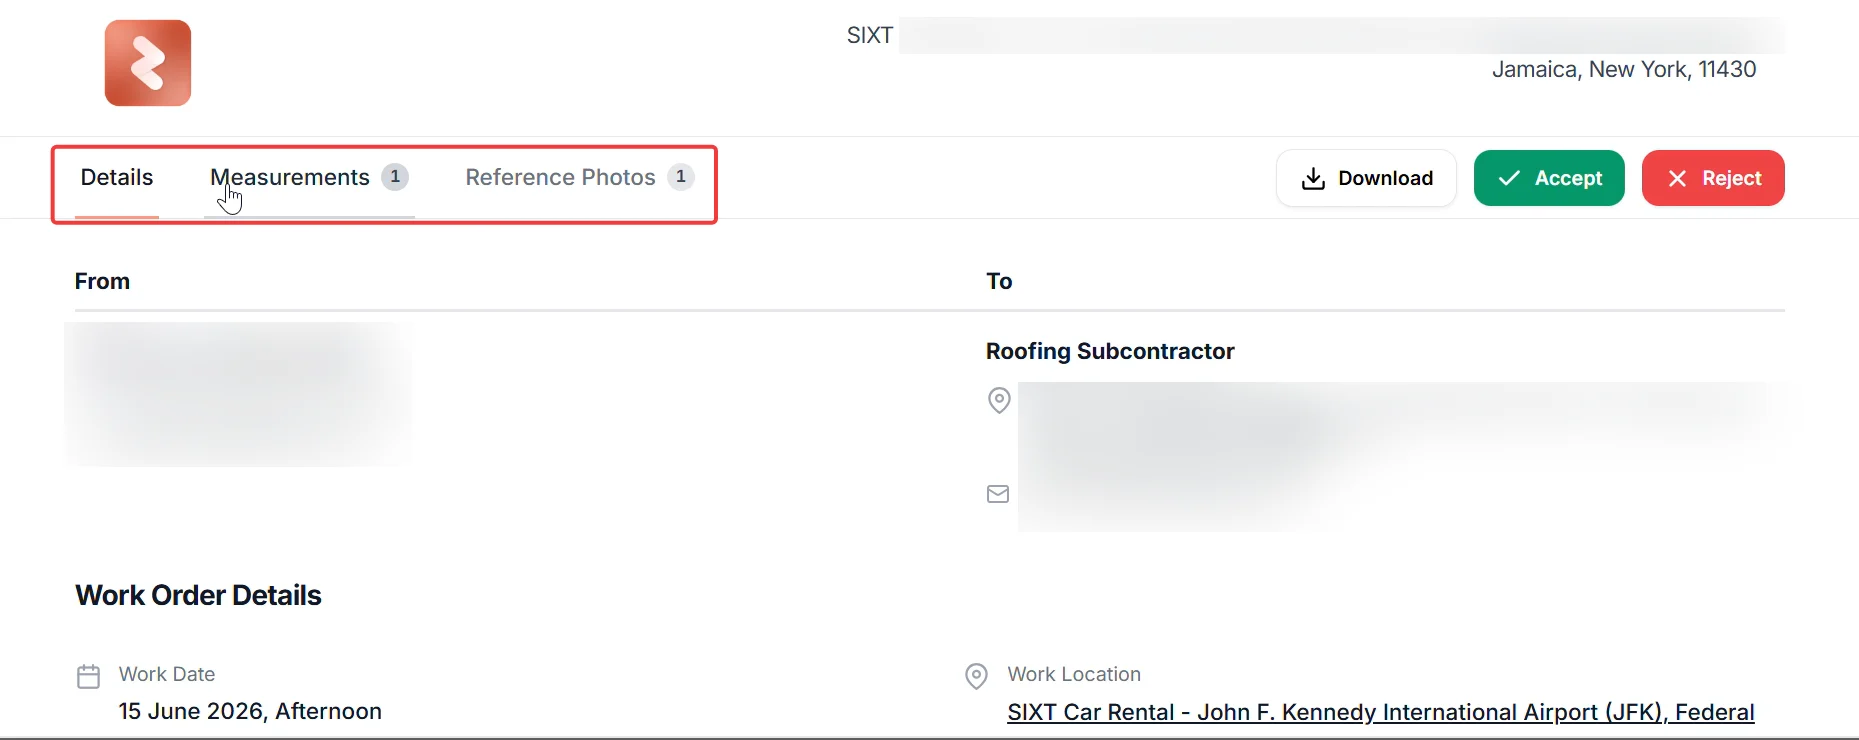
Review the work order
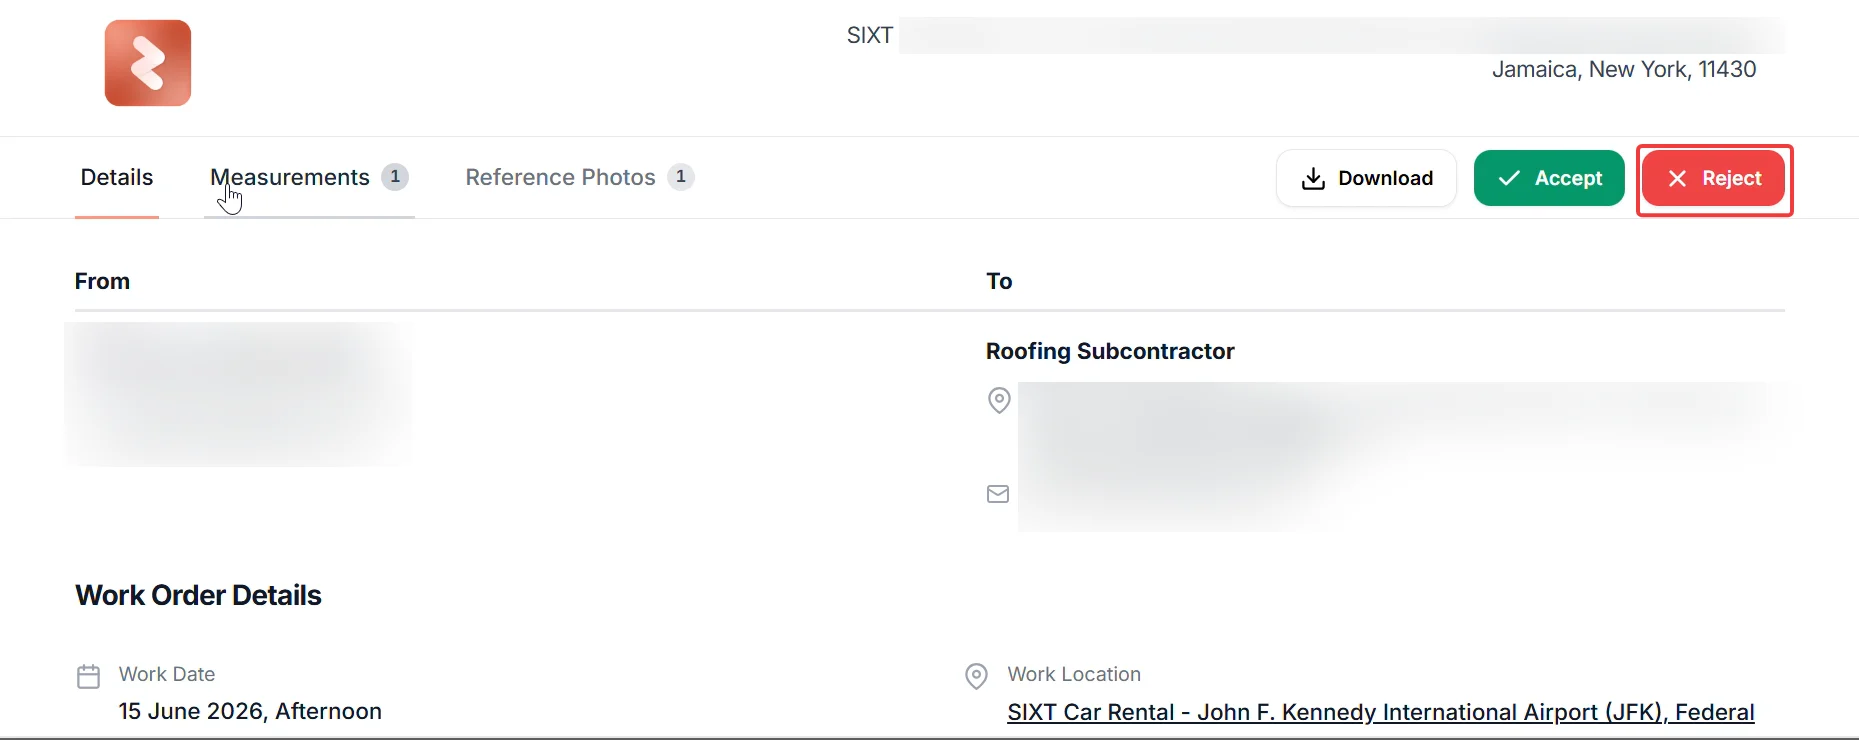
Before accepting or rejecting, review all the information on the portal carefully. The portal includes the following tabs:
You can also select Download to save a copy of the work order PDF for your records. This button appears once the status is set to accepted.
Accept the work order
- Select Accept in the top-right corner of the portal page. The Accept work Order dialog opens.
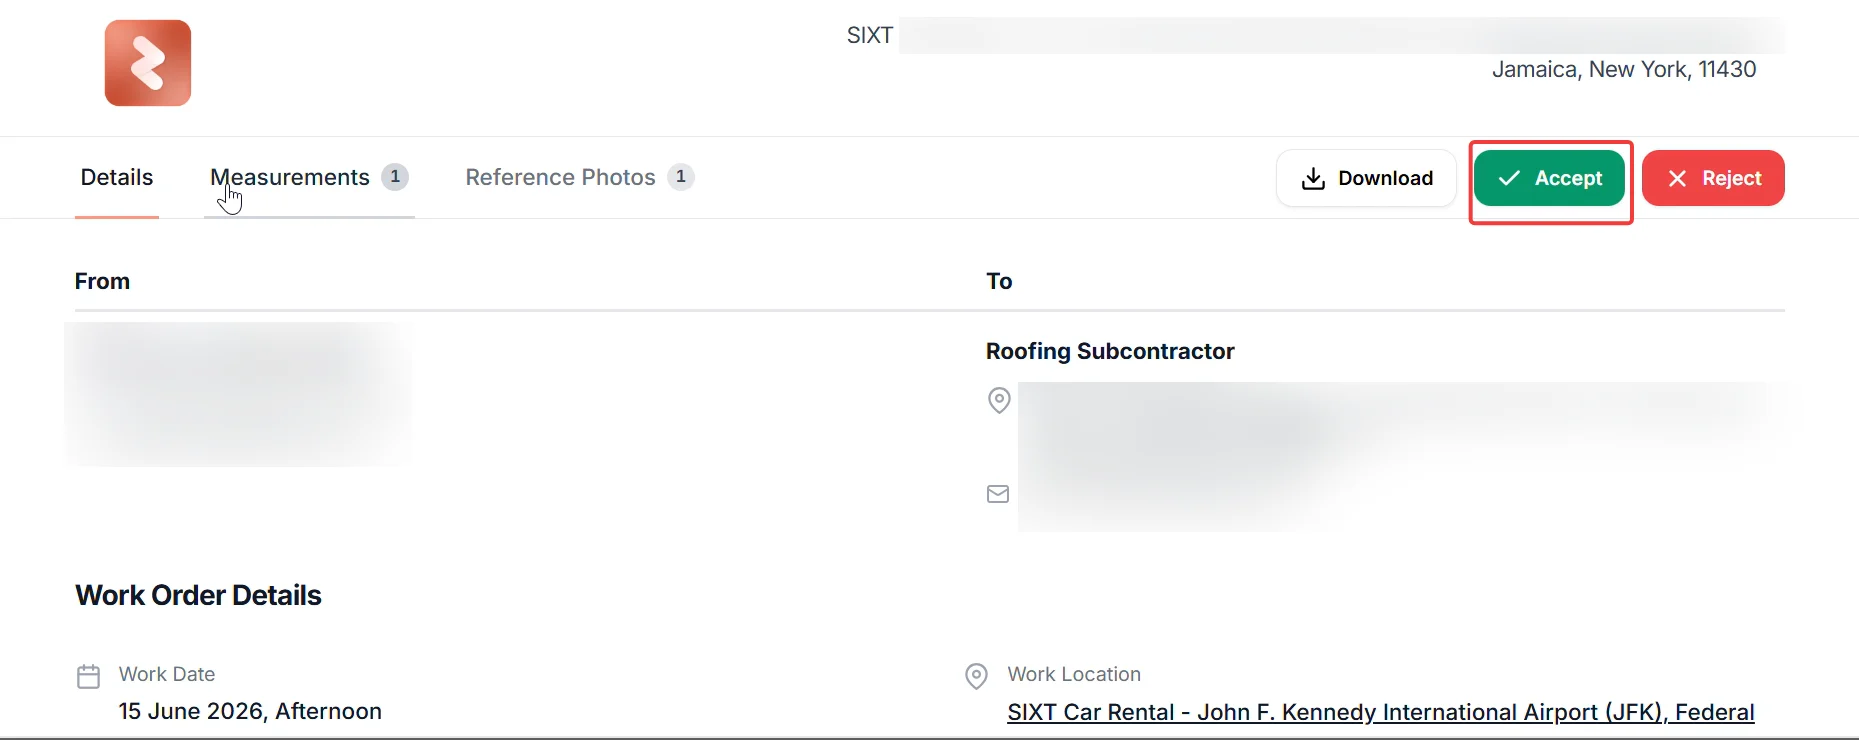
- Draw your signature in the signature area using your mouse or touchscreen.
- Select the checkbox to confirm you agree to the Terms and Conditions outlined in the work order.
- Select Accept to submit your signature.
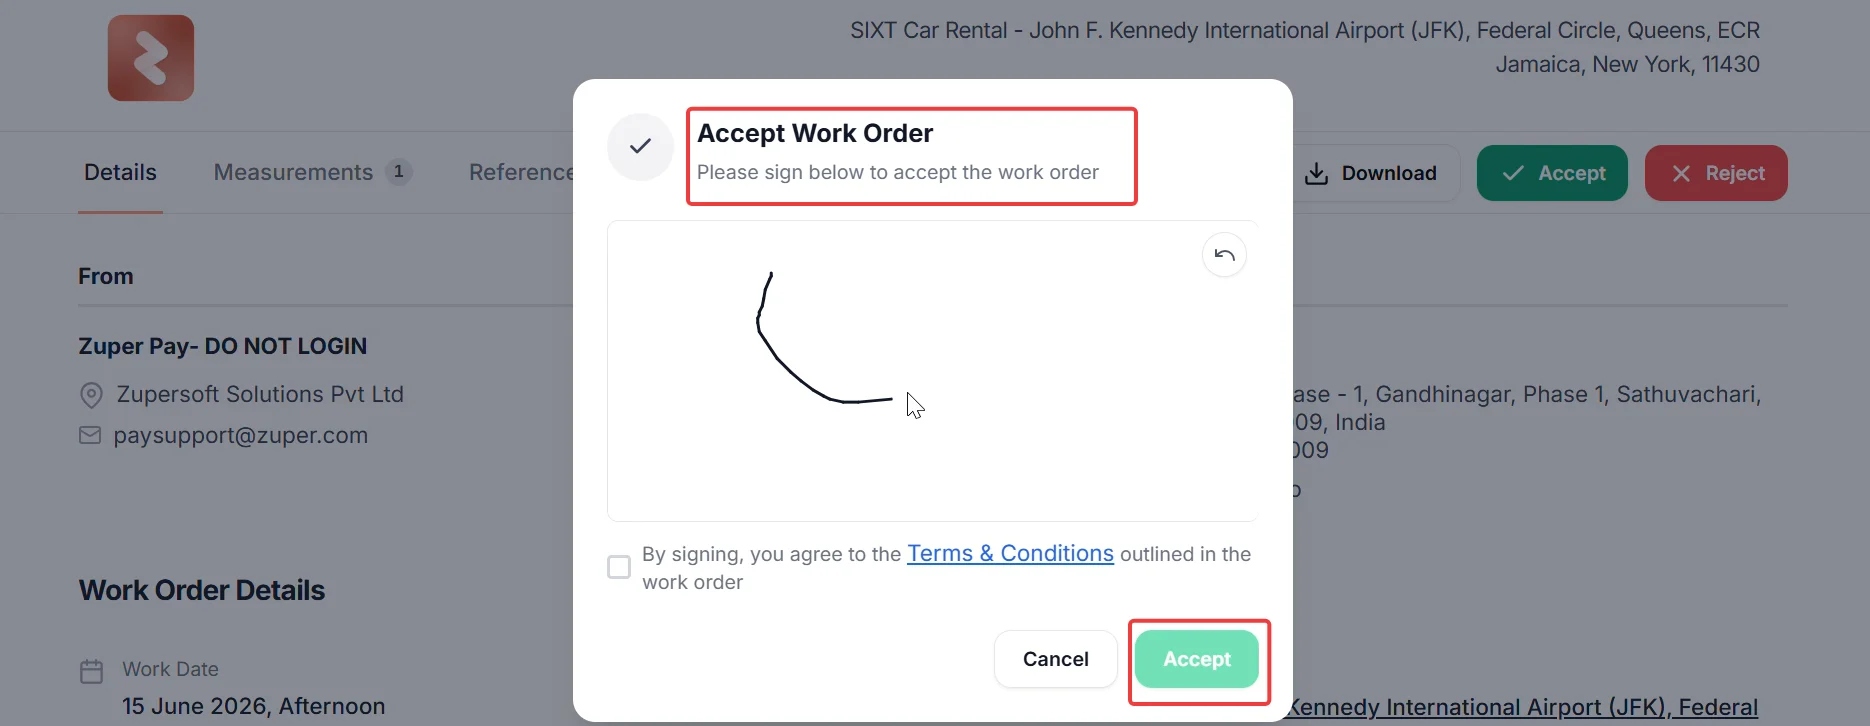
You must sign and select the Terms and Conditions checkbox before you can complete the acceptance. The Accept button remains inactive until both are done.
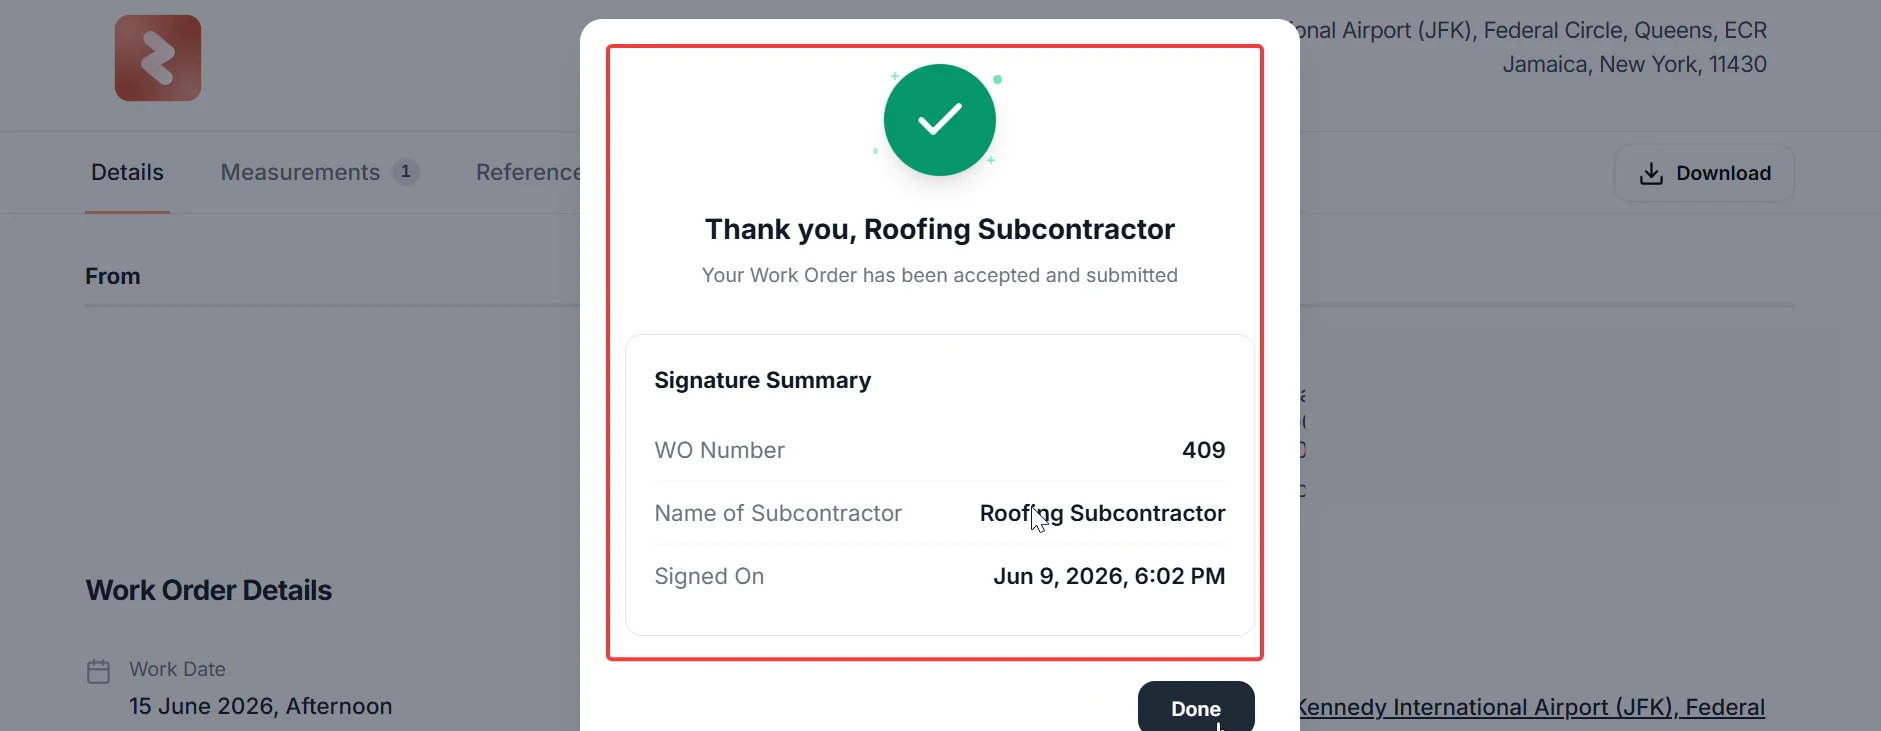
- Select Done to close the confirmation.
Two settings in Zuper affect how the subcontractor portal behaves when the email link is opened.
Require Vendor Approval: If your business has disabled this setting, the email link still takes you to the subcontractor portal to view the work order details. However, the Accept and Reject buttons do not appear. Contact your business to confirm how they want you to proceed.
Auto-send PO to vendor after approval: If your business has enabled this setting, Zuper automatically sends the work order to the subcontractor as soon as it is approved internally — no manual send is required. If you receive the email unexpectedly, this setting is likely on.
Reject the work order
If the work order details are not correct, you can reject it. Your business receives a notification to review and reissue the order.- Select Reject in the top-right corner of the portal page.
- Confirm the rejection when prompted.
Upload completed work photos
After you accept the work order, the Uploaded Photos tab becomes active on the subcontractor portal. Use it to upload photos of the completed work as evidence of completion.Upload photos to a work order
- Return to the subcontractor portal using the original link from your email, or open a new link if the business shares one.
- Select the Uploaded Photos tab at the top of the portal.
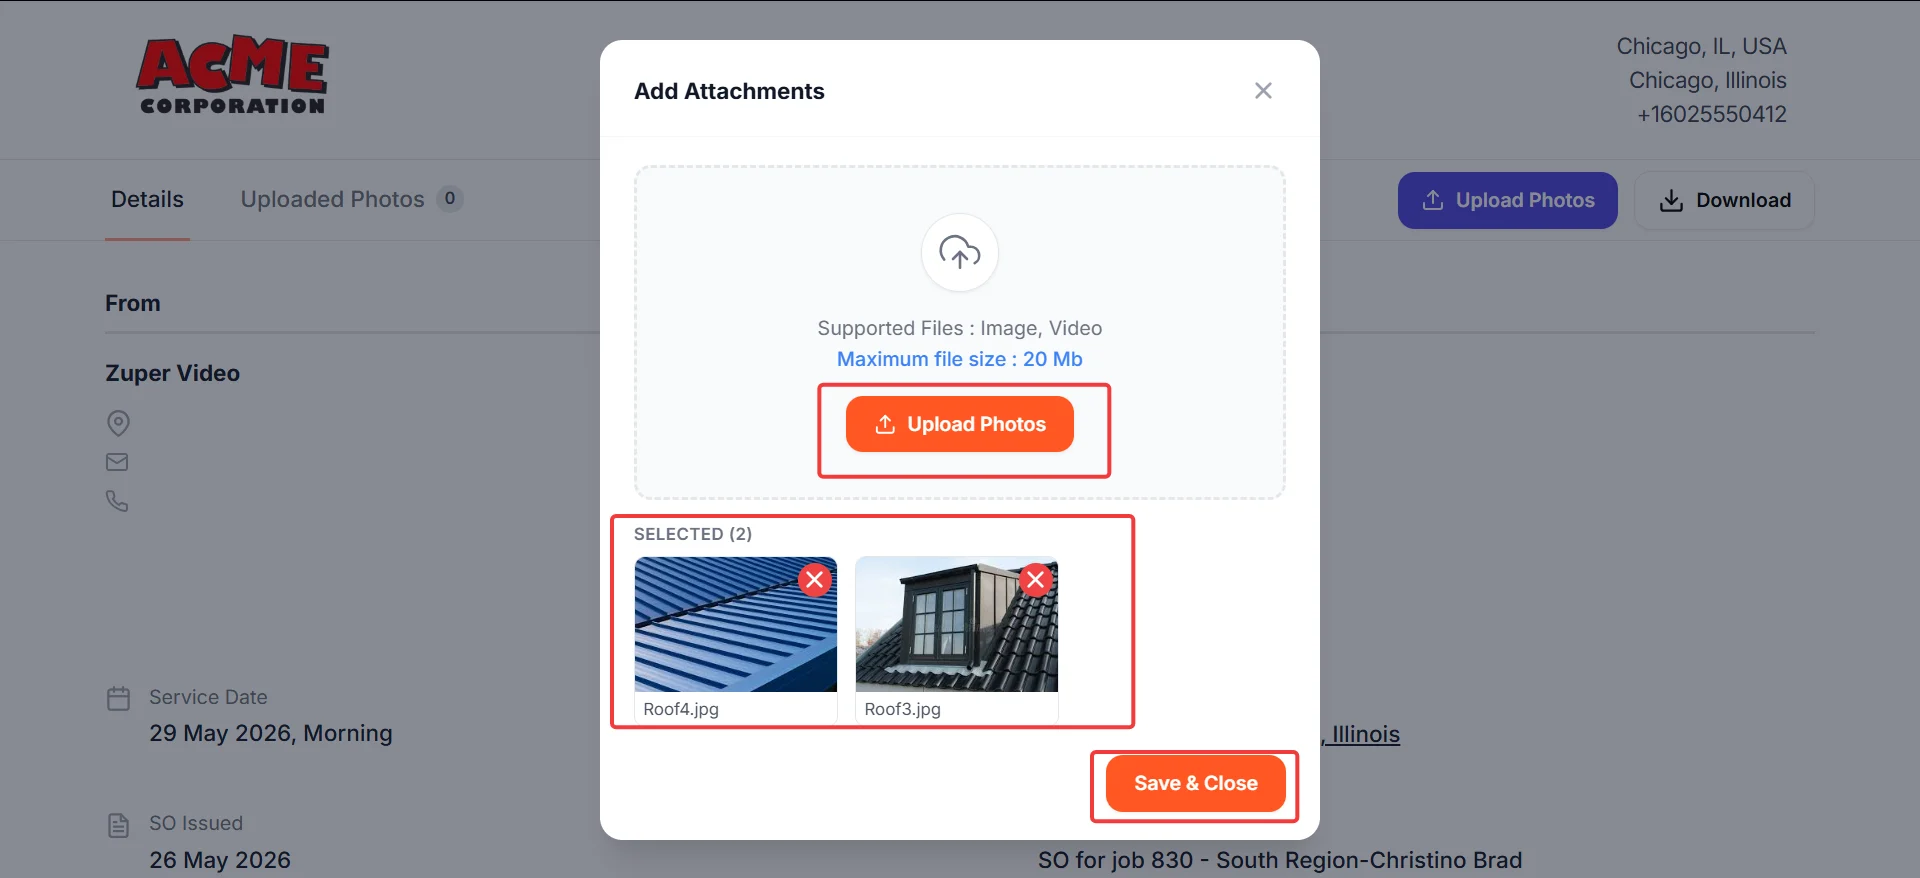
- Select Upload Photos in the top-right corner. The Add Attachments dialog opens.
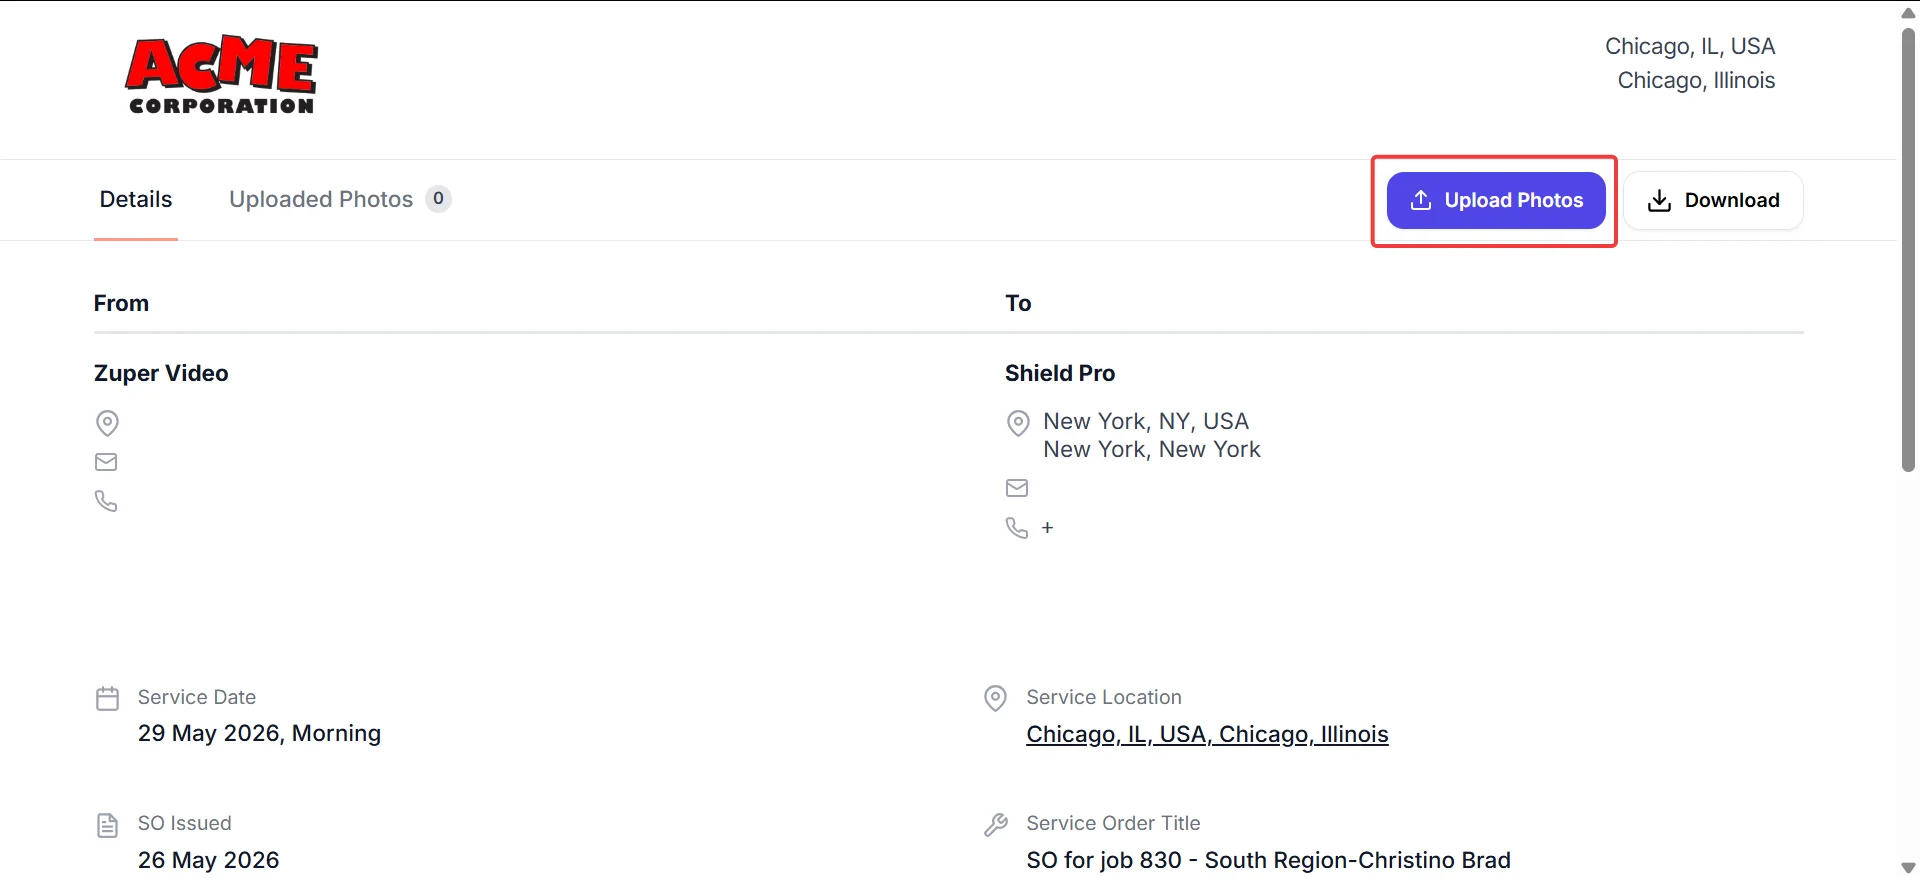
- Select Upload Photos inside the dialog to browse and select files from your device.
Supported file types: image and video files. Maximum file size per upload: 20 MB.
- Review the selected files shown in the Selected section of the dialog. To remove a file before saving, select the X on its thumbnail.
- Select Save and Close to upload the photos.
Where to find uploaded photos in Zuper
Once a subcontractor uploads photos through the portal, they become visible in Zuper in two places, so your internal team always has a complete record of the completed work. Work order attachments — The uploaded photos appear in the Attachments section of the corresponding work order detail page. Your team can view, download, or reference them directly from there. Job gallery — The photos also appear on the related job’s Gallery page in a dedicated album named work Order – [WO Number] Work Photos. This keeps all site evidence organized by work order, making it straightforward to review completed work alongside other job photos.FAQs
What happens after I accept the work order?
What happens after I accept the work order?
Zuper notifies your internal team that the work order has been accepted. The Uploaded Photos tab becomes active on the portal so you can upload photos of the completed work.
The signature summary — including the work order number, your company name, and the time of signing — is recorded and stored against the work order. Zuper also sends a confirmation email to the Zuper user or admin with a PDF attachment containing the full order details
The signature summary — including the work order number, your company name, and the time of signing — is recorded and stored against the work order. Zuper also sends a confirmation email to the Zuper user or admin with a PDF attachment containing the full order details
Can I accept or reject a work order after the link expires?
Can I accept or reject a work order after the link expires?
The approval link in the email might expire depending on your business settings. If the link no longer works, contact the business that sent the work order and ask them to resend it.
I do not see the Measurements or Reference Photos tabs. Why?
I do not see the Measurements or Reference Photos tabs. Why?
There are two possible reasons for this.
The business might not have added any measurements or reference photos to the work order. If no data of that type exists, the tab does not appear.
Alternatively, the business might have added measurements or photos but left the option to share them with you unselected when they sent the work order email. The data exists in Zuper but was not included in what was shared with you.
In either case, contact the business to confirm what has been shared and ask them to resend the work order if needed.
Can I upload photos before I accept the work order?
Can I upload photos before I accept the work order?
No. The Uploaded Photos tab becomes active only after you accept the service order. You must complete the acceptance and signature process first.
I accidentally rejected the work order. What should I do?
I accidentally rejected the work order. What should I do?
Contact the business that sent the work order. They can review and reissue it so you can accept it again.
If the issue continues, contact Support.
If the issue continues, contact Support.